4 Ways to Tell If Arduino Pro Mini Is 3.3V or 5V
Disclosure: Some of the links below are affiliate links and we only earn a small commission if you purchase through our links at no additional cost to you. The earning mainly used for maintaining the website.
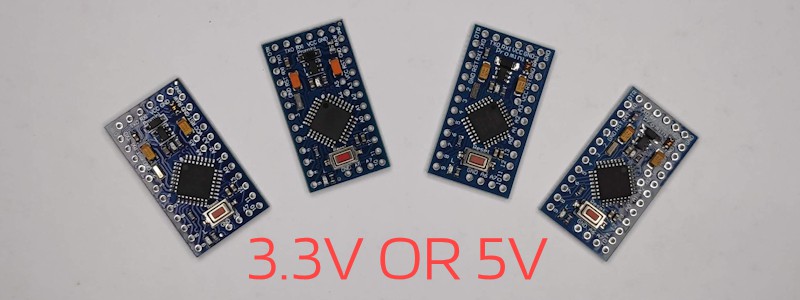
If you are familiar with Arduino Pro Mini, you definitely know there are two versions of the board. One is a 5V regulated voltage and the other one is 3.3V which is more commonly found today. As lower the voltage, the better power efficiency and that’s why more and more components are operating at lower logic levels.
Being said that, how well do you know your Pro Mini board? Or always confuse your boards’ voltage operating? Guessing them is bad and you may fry your boards. There are four easy ways to identify what is your Pro mini model.
What’s on Arduino Pro Mini Board
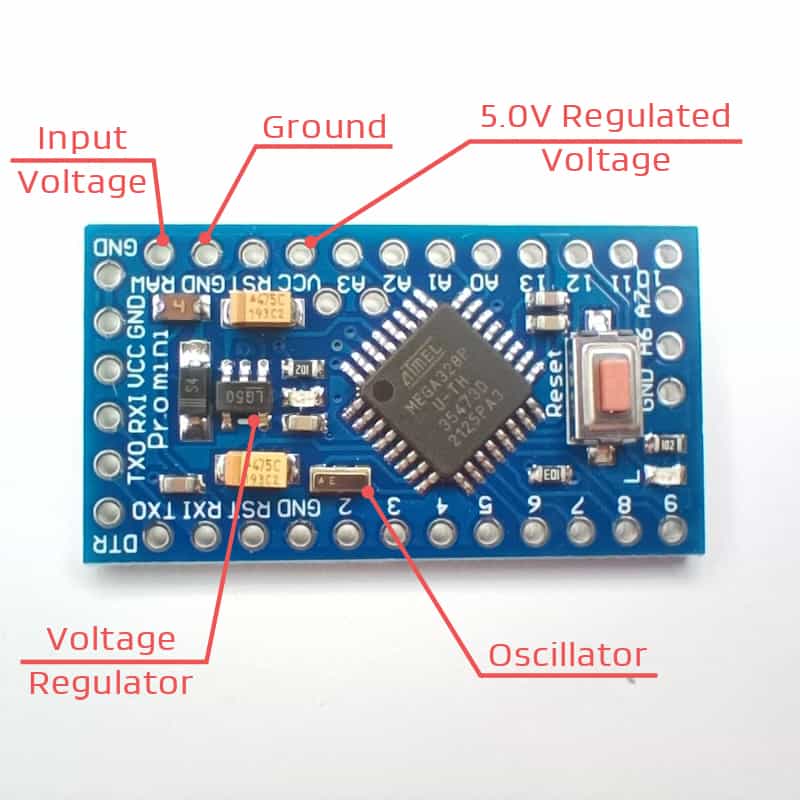
Before identifying what voltage your board is, you first need to know what components to look at. Those components can determine whether your board is 3.3V or 5V.
The voltage regulator of course is the first component to find out. To double confirm, the oscillator/resonator is another component you should look at. And also, know where are RAW (input voltage), GND, and Vcc (regulated voltage).
#1 Check for the Markings on Back of the Board
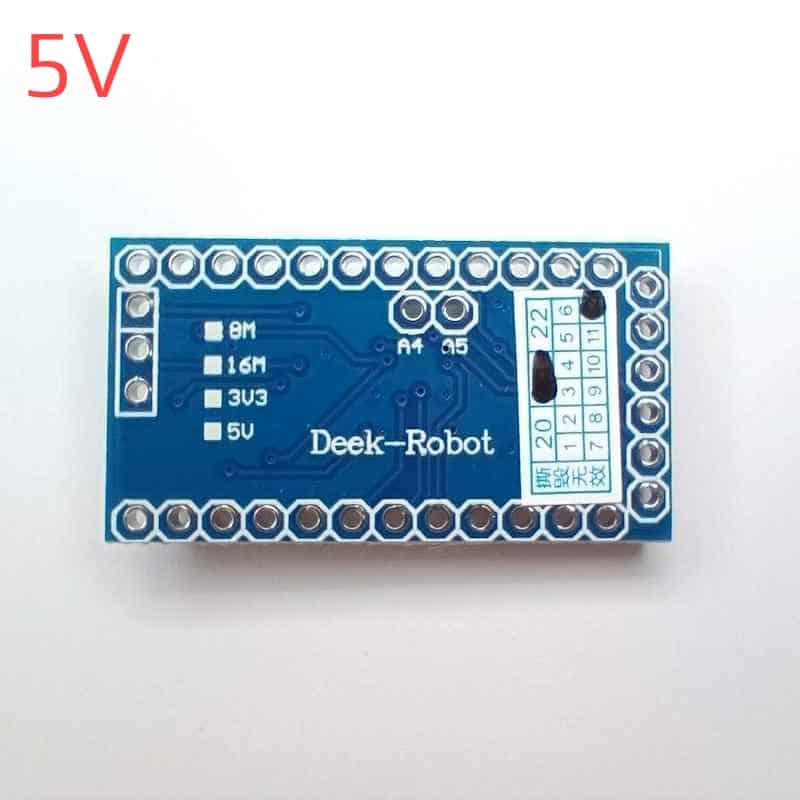
If you are lucky enough, the Arduino Pro Mini you bought is well-labeled on the back of the board. Usually, manufacturers will state whether the model is 3.3V or 5V at the back of the board. With the red marking at the side “8MHz” and “3V3” can confirm that the board I have is a 3.3V model.

However, more often the board you bought probably has no marking at all. We are not always that lucky to get board with good labels stating which model we have.
This is the easiest and fastest way to identify your board model provided you bought from a good manufacturer. If this is not the case, there are still other ways to find out.
#2 Markings on the Voltage Regulators
Any voltages (3.35V to 12V, depending on the model) supplied to the RAW (Input voltage to power up the board) will be regulated to the desired operating voltages. If the voltage is regulated to 3.3V, then you can confirm your Arduino Pro Mini is a 3.3V model.
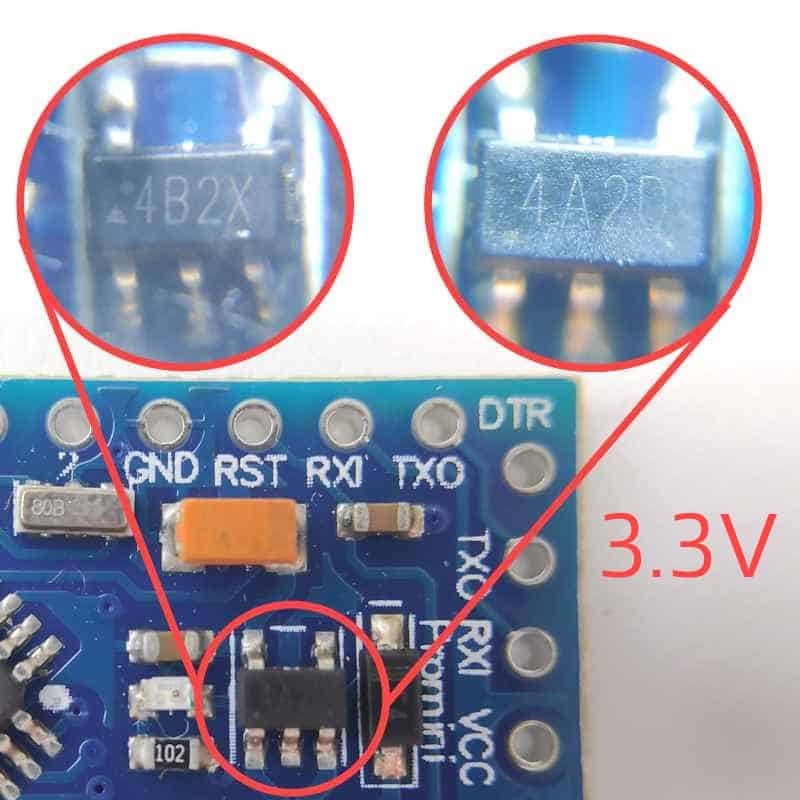
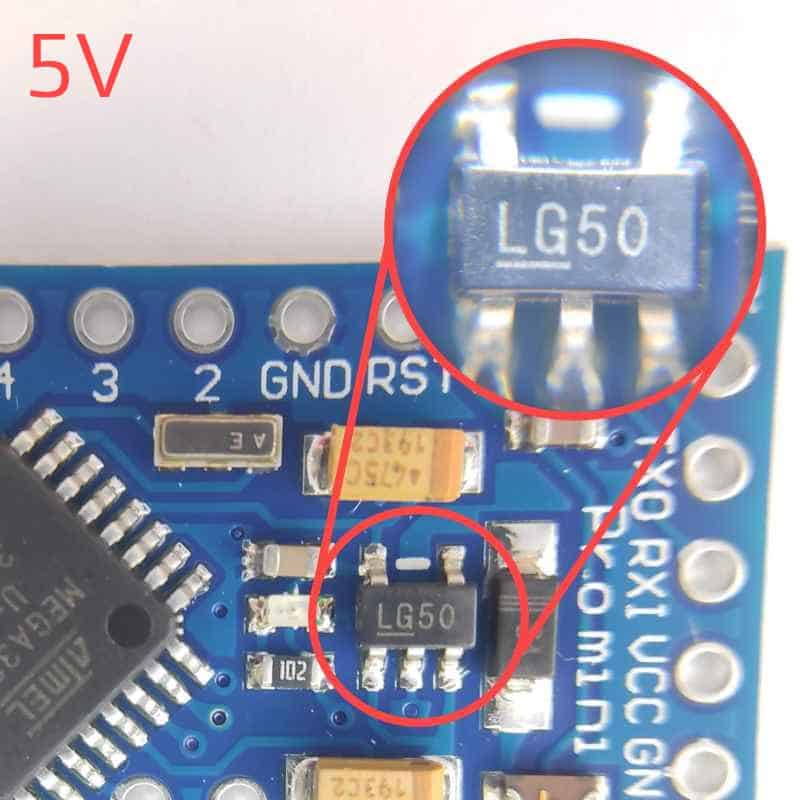
Magnify the voltage regulator to see the label on it. Different manufacturers have different labels indicating whether is a 3.3V or 5V regulator. As seen I have a few of the 3.3V models that have two different labels. The label “3” probably means 3.3V. The label “5” probably means 5V.
Labels on 3.3V Model
- KB33/LB33
- 4B2X
- 4A2D
- 662K
- 9B27
- S20K
- F34V
- L0RA
- L0RB
- LG33
Labels on5V Model
- LG50
- L250
- KB50/LB50
- L05
- L0UA
- L0UB
- 4BMD
#3 Markings on the Oscillators
The clock speed of Pro Mini 3.3V is 8MHz while for 5V is 16MHz. From the Atmega328P datasheet, page 260, we can very sure at voltage below 4.5V, the clock speed will not reach 16MHz.

On the oscillators, most of the Pro Mini 3.3V are labeled starting with “8” which we believe stands for 8MHz. For the 5V board, most labels start with “A”. Well, we do not see any relationship here.
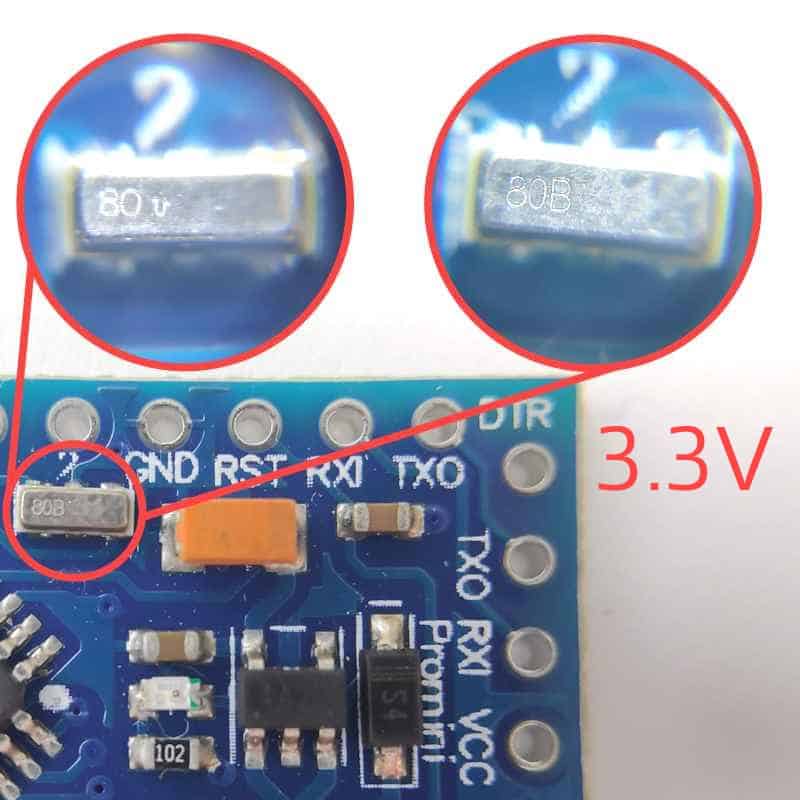

Oscillators Label on 3.3V Model
- 80E
- 80B
- 80M
- 80Q
- 80V
- K800
Oscillators Label on 5V Model
- AQ
- AG
- AN
- AE
- AF
- AI
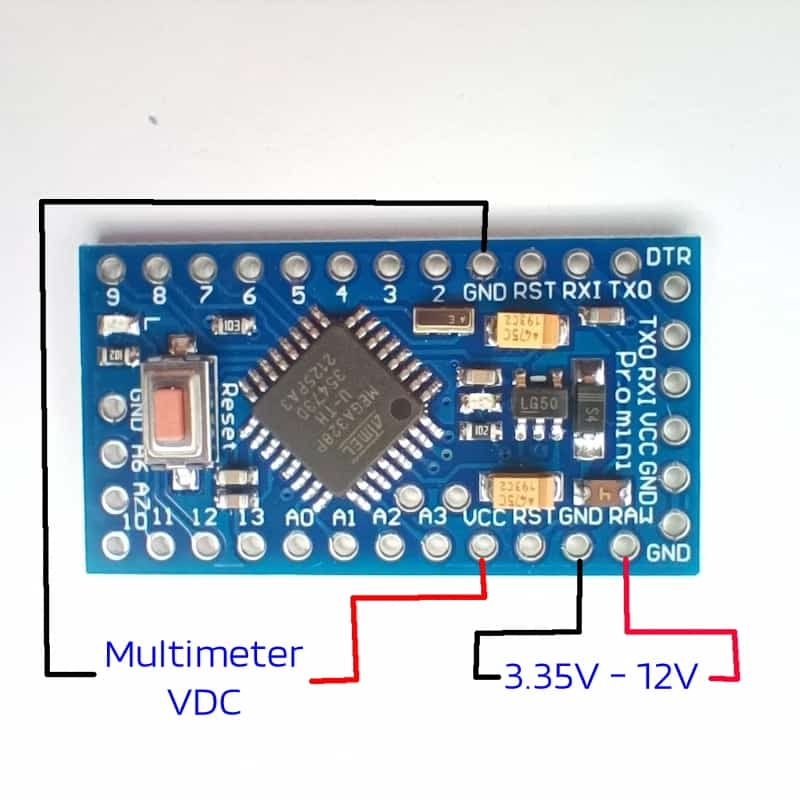
#4 Measure the Output Voltage (Vcc) of Arduino Pro Mini
This is the ultimate method that surely can differentiate between 3.3V and 5V. You will need a multimeter to measure the output voltage, Vcc of the Pro Mini.

On the left side is a 3.3V model while on the right side is a 5V model. Connect the power supply to the “RAW” and “GND” pins. Do know that the maximum voltage supply to the Pro Mini is 12V for both versions. So you can safely connect a 9V battery or any equivalent power supply. Then turn your multimeter to “VDC” measurement to measure “Vcc” voltage.


Your Thought
Let’s summarize the marking for each model.
Arduino Pro Mini 3.3V | Markings |
|---|---|
Voltage Regulator | KB33/LB33, 4B2X, 4A2D, 662K, 9B27, S20K, F34V, L0RA, L0RB, LG33 |
Oscillator | 80E, 80B, 80M, 80Q, 80V, K800 |
Arduino Pro Mini 5V | Markings |
|---|---|
Voltage Regulator | LG50, L250, KB50/LB50, L05, L0UA, L0UB |
Oscillator | AQ, AG, AN, AE, AF, AI |
Some of the markings are encountered by my units and some are from the internet. If you can not find yours in the table above, use a multimeter to measure the output voltage instead.
What is your Arduino Pro Mini model? Prefer to use 3.3V or 5V? Comment below and let us know.
This is exactly what I was looking for, thank you!
Good to hear that. Happy codding😎😎😎
Just what I was looking for. Thanks for this,
nice for me that somebody took the time
to post this.
No more fried boards anymore. Let’s be makers!
Mine has a 4BMD Voltage Regulator 4BMx is a 5v regulator. Last character is production run.
Thanks for sharing the info ^.^
I got lb2k tho
Hi, could you try the method 4, measure the Vout of the board. I believe it is 3.3V voltage regulator.